
Aluminum Injection Molds: When a Bridge Tool Is the Right Answer
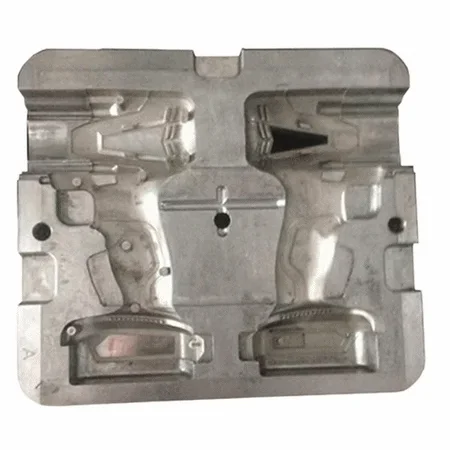
Aluminum injection molds are ordinary injection molds built from a metal that happens to machine fast, ship early and cool quickly. They are genuinely good tools – for producing a few thousand accurate parts in real production resin while a steel tool is still being machined. They are also genuinely limited in a way that has to be understood before the tool is ordered rather than after it has worn out. The difference between a smart aluminum tool decision and an expensive one comes down to one variable: whether the resin contains glass fibre. Get that wrong and a tool that quoted 40 to 60 percent below steel can be scrap metal within a few hundred shots. Get it right, and an aluminum tool is the fastest honest way to hold real moulded parts in your hands while your programme waits for production tooling. This guide covers what aluminum tooling is, where it genuinely wins, where it fails, and how to write a specification that does not leave either of those outcomes to chance.
When an aluminum bridge tool beats steel, and when it must not
An aluminum injection mold is the right choice when you need a small number of accurate parts quickly, in unfilled resin, and a steel production tool would take another six weeks or more to arrive. It is the wrong choice when the resin is glass or mineral filled, when the part has slides or lifters, when the melt temperature is high, when the programme will run for years, or when the part is a Class A cosmetic component going into long-term production.
The commercial case rests on four real advantages. An aluminum tool costs roughly 40 to 60 percent less than the same geometry in pre-hardened steel. It ships in 10 to 15 days against 25 to 35 days for steel, because there is no heat treatment cycle and no steel procurement wait. It machines two to three times faster. And it conducts heat about five times better than tool steel, so cooling time is shorter and the cycle is faster for the same geometry. Set against that, the tool has roughly a third of the hardness of pre-hardened P20 and cannot be re-hardened after machining, so it cannot be welded and remachined when it wears.
That last point is the one that decides projects. A steel tool is an asset that can be maintained for years. An aluminum tool is a fast, cheap instrument for a defined window – and the whole job of specifying one is to define that window precisely, in shots, in resin, before the tool is cut.
Where aluminum tooling fits and where it does not
The useful way to think about aluminum tooling is not as a cheaper steel tool but as a different instrument with a different job. Steel production tooling is built to be amortised over a programme and maintained for years. Aluminum bridge tooling is built to put accurate parts in your hands fast. Those two objectives are compatible on the same project – which is why the strongest programmes run both, in parallel, deliberately – and they are incompatible when a single tool is asked to do both jobs badly.
| Application | Aluminum verdict | Reason | Better alternative |
|---|---|---|---|
| Market test / pilot run, 1,000-10,000 parts, unfilled resin | Recommended | Low volume, gentle resin, schedule dominates the decision | None needed – this is the case aluminum was built for |
| Bridge production while a steel tool is still being built | Recommended | Parts behave like production parts; the feedback is real | None needed |
| Glass or mineral filled resin, any volume above a few hundred shots | Not recommended | Glass fibre is abrasive and cuts an aluminum cavity quickly | Pre-hardened steel, or hardened insert in an aluminum body |
| PEEK, PPS and other high-temperature engineering resins | Not recommended | Melt temperature exceeds what an aluminum cavity tolerates | H13 or 1.2344 |
| Complex slides, lifters or side actions | Not recommended | Sliding surfaces need a wear-resistant face aluminum cannot hold | Pre-hardened steel with hard chrome or nitrided wear lands |
| Hot runner manifolds | Not recommended | Manifolds run hot and steady; aluminum loses dimensional stability | Steel hot runner system |
| Long-run production, 50,000+ parts | Not recommended | Tooling cost is amortised over the whole programme, and steel wins there | Steel production tool |
| Class A cosmetic part entering long-term production | Conditional | Achievable, but a soft tool holds a surface for far less time | Steel for production; aluminum is fine for market-test samples |
Two decisions carry most of the risk. The first is filler. Glass fibre is a mineral abrasive; run it against an aluminum cavity and it will cut the cavity rather than the part. The second is time. A bridge tool that quietly reaches the end of its useful life at month seven, when the steel tool has slipped to month nine, leaves a gap in production that nobody planned for. Both risks are eliminated by writing the tool life down in the specification and by designing the transition to steel in advance.
The four alloys you will be offered
Almost every aluminum tool is one of a small number of alloys, and the differences between them matter less than buyers usually expect and more than suppliers usually explain. What matters is not the alloy name but which features need to be machined and which can be formed, because that is what decides whether a harder, slower-to-machine alloy buys you anything.
| Material | Typical condition | Hardness | What it is used for | Machining note |
|---|---|---|---|---|
| 7075-T6 | T6 (aged) | ~150 HB (10 HRC equivalent) | Bridge tooling, multi-cavity prototypes, parts needing moderate strength | Machines fast in 5-axis; the default choice for most bridge tools |
| 6061-T6 | T6 (aged) | ~95 HB (6 HRC equivalent) | Larger, simpler tools and high-speed short-run work | Machines fastest of the common alloys; lower wear resistance |
| QC-10 | Cast, aged | ~140-150 HB | Large or complex tools where features exceed what CNC can reach cleanly | Cast then machined; harder than 7075 in a cast geometry |
| P20 (pre-hardened steel) | As supplied | 30-35 HRC | Production tooling, bridge tools needing long life, glass-filled resins | The comparison point: roughly 3x the hardness of 7075 |
| H13 / 1.2344 | As supplied | 42-48 HRC | High-temperature, hot runner and long-life production tools | Higher hardness, lower thermal conductivity, slower cutting |
Note the hardness column. P20 at 30 to 35 HRC carries roughly three times the hardness of 7075-T6, and that ratio is the whole story of aluminum tool life. It is also why a glass-filled programme in aluminum is a bad bet even at a low shot count: the abrasive loading is what turns a soft cavity into a worn cavity in a few hundred shots, where the same resin in steel is unremarkable for half a million.
One point of terminology is worth clearing up early, because it causes confusion in every aluminium enquiry. 6061 and 7075 are wrought alloys – rolled and aged, then machined. QC-10 and similar are cast alloys – poured into a near-net shape and then machined. Casting is how you get a large tool with features that would take too long to cut from solid plate, and how you get a hardened surface in a body that is still easy to machine. Where a supplier offers “aluminum tooling” without naming the alloy, ask which one and why.
Tool life: the number that decides the economics
Every aluminum tooling conversation eventually arrives at shot life, and most of the confusion in that conversation comes from quoting a single number as though it were a property of the material. It is not. It is a property of the resin, the geometry, the surface finish and the cycle conditions combined, which is why a supplier who quotes tool life without asking what you are moulding is quoting a number that does not mean anything.
| Resin family | Filled? | Indicative shot life | Note |
|---|---|---|---|
| Unfilled PP, ABS, PC/ABS | No | 3,000 – 10,000+ | Gentleest common case; the tool can often be reworked once |
| Unfilled PA6, PA66 | No | 2,000 – 8,000 | Slightly higher melt temperature; still comfortable |
| TPU, TPE | No | 1,500 – 5,000 | Elastic recovery puts load on the parting line |
| 30% glass-filled PA66 | Yes | 200 – 1,000 | The single most common reason aluminum tools fail early |
| 20-30% glass-filled PP | Yes | 300 – 1,500 | Abrasive but often survivable for a bridge programme |
| PPS, PEEK | Yes / high temp | Under 500, or not recommended | Abrasive and thermally demanding at the same time |
The honest midpoint for a commercial unfilled-resin tool is around 2,000 shots, and the range around it is wide. That number, however, is only meaningful alongside a maintenance regime, because the difference between an aluminum tool that reaches 5,000 shots and one that stops at 1,500 is usually cleaning and inspection discipline rather than the alloy. Require the interval, the cleaning method and the escalation path. If a tool is inspected at 500-shot intervals and the cavity is polished when wear first shows, the upper end of the range is reachable. If nobody is going to look at the tool until it produces visibly bad parts, the lower end is what you get.
There is also a design lever that is worth more than the alloy choice: hardened inserts for glass-loaded surfaces. Putting a steel insert into an aluminum body puts the wear surface exactly where the abrasive resin touches it, while keeping the aluminum doing the job of holding the geometry cheaply. Where the budget allows, this is the answer to the abrasive problem, and it is much better than simply declining the project.
The real cost comparison, including what it leaves out
The 40 to 60 percent saving on the tool is real, and it is also narrower than it first appears. Tooling is only one line of the project cost, and that line is itself only part of the unit economics. Working the arithmetic honestly is the difference between a decision that pays off and one that was sold on a headline number.
| Factor | Aluminum tool | Pre-hardened steel tool | Which matters more |
|---|---|---|---|
| Tool cost, same geometry | Baseline – typically 40-60% less | Baseline | Low-volume or one-off projects |
| Delivery | 10-15 days | 25-35 days | Market tests, launch programmes, anything schedule-driven |
| Achievable shot life | 500 – 10,000 (resin dependent) | 100,000 – 500,000+ | Long production runs |
| Machining and finishing | 2-3x faster; no heat treatment cycle | Slower; heat treatment and stress relief add weeks | Almost always favours aluminum |
| Cooling time per shot | Shorter – far better thermal conductivity | Longer | High-cycle, high-volume work |
| Tool weight | About one third | Baseline | Handled tools and smaller presses |
| Repair path | New tool or mechanical insert | Weld, re-machine and re-harden | Long-running programmes |
| Part cost per unit | Higher per part once the tool is amortised | Lower per part over a long run | Volume decides which wins |
So if tooling represents 15 percent of your unit cost, halving the tooling cost saves under 8 percent of unit cost. That is a real saving, but it is a schedule and cash flow decision rather than a cost of ownership decision, and it should be argued on that basis. The place an aluminum tool wins decisively is not the unit cost – it is the weeks. A market test that reaches the customer six weeks earlier generates a different amount of information, and in a programme where the part might be discontinued in quarter three, that information is worth more than the tool cost.
There is one further economic effect that is easy to miss. A bridge tool that runs to 2,000 shots is not a cheaper steel tool; it is a parallel production path. While the steel tool is in machining and then in trial, the aluminum tool is already producing saleable or shippable parts. For a launch programme, that converts a fixed tooling investment into revenue months earlier, and it is the reason that for many HLM projects the aluminum tool pays for itself several times over before the steel tool has ever run a part.
The engineering differences that change the design
Three material properties genuinely change how a tool is engineered, and knowing them in advance avoids the expensive version of a learning curve.
Thermal conductivity. Aluminum conducts heat roughly five times better than pre-hardened tool steel. That is usually an advantage – cooling time is shorter and the cycle is faster for the same geometry – but it has a second-order effect: because heat leaves the tool faster, the tool temperature stabilises more quickly, which can make the part dimension more consistent once the tool is running rather than less. It also means a conventional cooling calculation based on steel properties will be conservative for an aluminum tool, and it is worth asking the supplier whether they recalculated it or simply copied the steel numbers across.
Hardness and wear. An aluminum cavity has no wear margin. A steel cavity can be reworked, re-hardened and put back into production. An aluminum cavity that wears does not recover. The practical consequence is that the design has to account for the tool’s own life rather than treating the tool as permanent, and that the areas where the resin is loaded hardest – the sprue, the runner, the end of fill, and any glass-loaded feature – are where the reinforcement or the insert has to go.
Stiffness and deflection. Aluminum has roughly a third of the stiffness of steel. Under clamping and injection pressure an aluminum cavity deflects more, and that deflection shows up as a dimension that moves between a new tool and an aged one. For a cosmetic part, or any part with a tight interface fit, this has to be designed around with adequate support and backing rather than left to the machinist.
One more property deserves a specific mention because it is routinely promised and rarely delivered: surface finish. Aluminum polishes readily and takes a high gloss easily – that part is true. But a soft, compliant cavity with a high-gloss finish will show handling damage that a steel tool would absorb, and for a Class A cosmetic part the finish and the wear life are the same problem seen from two sides. Aluminum is a good answer for market-test samples and a poor answer for a long-term cosmetic production tool.
Writing an aluminum tooling specification
The failures in aluminum tooling are almost never metallurgical. They are specification failures – a requirement that was understood differently on each side, or a number that was never written down. Eight items belong in the brief, and every one of them is a question whose answer should be recorded before the quotation is accepted.
| Specification item | What to state | Why it matters |
|---|---|---|
| Resin and filler content | Polymer family, glass or mineral filler percentage | The single variable that decides whether aluminum is viable at all |
| Target shot count | Number of parts the tool must produce | Sets the alloy and the surface treatment |
| Tool life expectation | Stated shots before replacement | A supplier who will not state it has not priced the risk |
| Surface finish | SPI class, and whether gloss or texture is required | Aluminum polishes well but scratches easily |
| Cooling requirement | Whether a heat exchanger or baffle is needed | Thermal conductivity changes the cooling calculation |
| Insert strategy | Which features need a hardened steel insert | Protects the glass-loaded surfaces without changing the tool body |
| Maintenance regime | Inspection interval and cleaning method | Aluminum tools are specified with a maintenance plan, not a repair plan |
| Upgrade path | Whether a steel tool will follow, and on what trigger | Most bridge programmes become production programmes |
The item that buyers most often leave out is the upgrade path, and it is the one that protects the programme. Most bridge-tool projects become production projects. The question is whether the supplier is building the aluminum tool with that in mind – a geometry and a steel quote that the production tool can follow without redesign, and a trigger point for the switch. A supplier who has thought about this is telling you they expect to be your production supplier too, which is a useful signal in its own right.
Running aluminum tooling in production
An aluminum tool can run in a production press with the same equipment and the same settings as a steel tool. What differs is the relationship between the tool and the cycle. Because the cavity conducts heat away faster, the tool reaches thermal equilibrium sooner, and the first few hundred shots are where the dimensional behaviour settles. The practical recommendation from toolrooms running this daily is to measure rather than assume during the first 500 shots, and to treat the trial report as a description of the process window rather than a single successful set of parts.
Cleaning is the second practical difference. The same abrasiveness that limits the tool’s life is usually what contaminates it, and contaminated cavities produce the flash and short shots that get misdiagnosed as a settings problem. A short, written cleaning interval – typically at every tool change and more often on a glass-filled programme – does more for the tool’s effective life than any surface treatment. This is also why a maintenance regime belongs in the specification rather than in a folder somewhere: the person running the press at 2am needs to know what the interval is.
For the wider view of how the cycle phases interact with tool material, our injection moulding process guide covers the five phases and where the control points actually sit. The overlay that aluminum adds is in the cooling phase, where a faster- conducting cavity changes the arithmetic the whole cycle is built on.
Where aluminum tools fail, and what it costs
Four failure modes account for essentially all of the aluminum tooling problems we are asked to diagnose. They are worth naming precisely, because each has a distinct signature and each is preventable at a different stage.
- Early abrasive wear on a glass-filled programme. The signature is a cavity that develops a visible wear pattern along the flow direction, with dimensional drift appearing before any visible damage. The cause is filler loading, and the prevention is an insert, a coating, or steel. If the tool is already running this programme, the honest assessment is that the programme has to stop until one of those three is in place.
- Softening or distortion from melt temperature. The signature is a tool that was fine for unfilled resin and then moved to a higher-temperature grade, and lost dimensional accuracy without obvious damage. This is not recoverable and not repairable – the tool is finished.
- Deflection-related dimensional drift. The signature is a part that is slightly out of tolerance in a way that changes with the tool’s thermal state, or a parting line that varies across the tool. The cause is insufficient support for the cavity, and it is a design issue.
- Handling damage to a cosmetic surface. The signature is a cosmetic defect that appears on parts from a specific cavity or a specific shift, rather than a gradual drift. The cause is the tool being moved or handled with insufficient care, which on a soft, polished cavity becomes a permanent defect in the part.
The common thread is that none of these is a surprise in hindsight. Each was predictable at the specification stage, which is why the specification matters more than the alloy. For the general symptom-to-cause map on standard geometry, our injection moulding defects reference covers the wider set, and the defects troubleshooting guide covers the order in which to work through them.
Checking whether a supplier actually builds aluminum tools well
Most of the difference between a supplier who builds aluminum tools well and one who builds them cheaply shows up before the quotation, in the questions they ask and the ones they decline to answer. That makes it possible to screen without reference to price.
| Check | What a good answer looks like | What a weak answer looks like |
|---|---|---|
| They ask about the resin first | Asks for polymer family and filler percentage before quoting | Quotes a price from the drawing alone |
| They state a shot life | Gives a number tied to your resin and explains the basis | Says the tool will run ‘hundreds of thousands of shots’ |
| They discuss inserts | Proposes a hardened insert for glass-loaded features | Offers a single-material tool for everything |
| They address the transition | Explains how the steel tool follows and what triggers it | Treats the bridge tool as the final tool |
| They give a realistic date | 10-15 days for aluminum, with the steel date quoted separately | Gives one date for both and does not distinguish them |
| They document the process | Sends a trial report showing real production resin parts | Sends sample parts made in a different material |
The row that matters most is the first one. A supplier who asks for the polymer family and the filler percentage before quoting is a supplier who has decided whether aluminum is viable for your part. A supplier who quotes from the drawing alone has not made that decision yet, and will let you make it by accident. Our guide to choosing an injection mould manufacturer covers the general supplier evaluation, and aluminum tooling adds three questions to that list: what alloy do you intend to use and why, what shot life are you quoting for our resin, and what happens to the tool when it reaches that number.
Moving from a bridge tool to a production tool
Most aluminium programmes are two-tool programmes. The bridge tool gets the programme to market and the production tool takes it the rest of the way. The transition is where projects lose time, because it is usually treated as an afterthought rather than a plan.
Three things make the transition cheap. The first is to fix the geometry early: a bridge tool and a production tool built from the same released drawing file are interchangeable in the ways that matter. The second is to decide the trigger before it is needed – a shot count, a date, a quality finding, or a volume forecast – and write it down. The third is to run the two tools in parallel for a defined overlap rather than switching on a date, so that the production tool’s own trial parts can be compared against a known-good aluminium tool’s output.
Our aluminum injection mould page describes how we build and run bridge tooling, and the rapid tooling versus production tooling guide covers the volume bands where each one belongs. For the steel side of the transition, the tool steel selection guide covers which steel to specify once the production tool is being scoped, and the mould design checklist covers the design decisions that are worth making before either tool is quoted.
Three aluminum tooling decisions and what they turned out to be
Aluminum tooling goes wrong in a small number of ways, and the pattern is consistent across the three cases below: the technical work was rarely the problem, and what decided the outcome was whether the resin and the shot count were written down before the tool was cut. These are drawn from our own toolroom.
Case 1: The market test that produced real parts in eleven days
A US consumer electronics customer needed 1,500 units of a device enclosure to support a market launch, with a production steel tool scheduled to arrive six weeks later. The part was an unfilled ABS housing with a fine texture and two snap fits. The commercial decision was straightforward, but the engineering one was not: the finish was cosmetic, the snap fits were on the critical feature, and the client had already been told by a competitor that aluminum tools were “not for real parts”.
We cut the tool from 7075-T6 in five-axis CNC, with the snap-fit region supported against deflection and the parting line backed rather than left as a single unsupported edge. The tool delivered in 11 days and ran 4,200 shots across the pilot run, which covered the market test and the first production batch before the steel tool was ready to take over. The texture finish held throughout, with no cosmetic rejects attributable to the tool. The general lesson is that a market-test programme is not a lesser programme – it is a programme where the resin, the shot count and the feature criticality have to be known before anyone cuts steel, because a bridge tool has no margin for a surprise. Our mould design checklist covers the design decisions that belong before either tool is quoted.
Case 2: The glass-filled programme where the answer was no
A German automotive tier supplier asked for an aluminum tool for a 30% glass-filled PA66 bracket running 40,000 parts a year. On paper the numbers looked attractive: a favourable tool price and a schedule the programme needed. On examination the resin was the whole answer.
Glass fibre is a mineral abrasive. Running it against an aluminum cavity cuts the cavity rather than the part, and 40,000 shots is far beyond the point where an uncoated aluminum cavity holds a dimension. We quoted two options instead: a pre-hardened steel tool for the production programme, and a short-run aluminum tool with a hardened steel insert in the glass-loaded feature, for the pre-series parts where the schedule was tight. The client took the steel tool for production and the insert version for pre-series. The general lesson is that “aluminum or steel” is a resin question before it is a tool question, and that a supplier who quotes aluminum without asking about filler content is guessing rather than engineering. For the wider picture on abrasive wear and the other common failure modes, our defects troubleshooting guide covers the symptom-to-cause map.
Case 3: The bridge tool that became the production tool by accident
A Polish appliance customer launched on an aluminum bridge tool because their programme could not wait 25 days for steel. The tool performed well through the launch, and the customer then asked for the same part in production quantities with a longer programme.
Here is the mistake that was avoided by luck rather than by design: the production geometry had drifted during the launch. Two tolerance-critical features had been tightened by the customer’s engineers without a change notice, and the aluminum tool, being more compliant than the steel tool they had originally specified, had been absorbing the difference with a slowly shifting dimension that showed up as a consistent bias in one interface. The parts were still within the drawing tolerance, but they were sitting at one edge of it, and the steel tool would have been designed and quoted against a tighter nominal than the one the production tool would actually need to hold.
The remedy was a re-cut of the affected features, and a re-quote for the production steel tool against the revised geometry. The general lesson is that a bridge tool and a production tool must be built from the same released geometry, and that the transition needs a written trigger – a shot count, a date, or a quality finding – rather than being triggered by whatever the order book happens to do. Our rapid tooling versus production tooling guide covers the volume bands and the transition points in more detail.
Aluminum tooling terms quick reference
| Term | What it means in practice | Why it matters when specifying a tool |
|---|---|---|
| Bridge tool | A tool built to produce parts while a production tool is still being manufactured | The core reason aluminum tooling exists; sets the expectation that a second tool follows |
| 7075-T6 | A wrought, age-hardened aluminum alloy, the default choice for bridge tooling | Good balance of machinability and hardness; about 150 HB |
| 6061-T6 | A wrought aluminum alloy that machines faster but is softer than 7075 | Suits larger, simpler tools; less wear resistance |
| QC-10 | A cast aluminum tooling alloy, harder than wrought grades and usable in large geometries | Relevant when features exceed what CNC machining reaches cleanly |
| P20 | A pre-hardened tool steel supplied at 30-35 HRC without further heat treatment | The comparison point for aluminum; roughly three times the hardness of 7075 |
| Shot life | The number of cycles a tool produces before wear affects part dimensions | The single number that decides aluminum viability; must be quoted against your resin |
| HLM | High mix, low volume production – many different parts in small quantities | The commercial environment where bridge tooling pays for itself |
| Abrasive wear | Mechanical wear caused by hard filler in the resin, principally glass fibre | The main reason unfilled and glass-filled programmes get opposite recommendations |
| Insert | A replaceable piece of harder material fitted into a tool body | How you protect glass-loaded features without changing the tool architecture |
| Thermal conductivity | How quickly heat moves through the tool material | Aluminum conducts about five times better than steel, which shortens cooling time |
| Cavity deflection | Movement of the cavity under clamping and injection pressure | Aluminum is about a third as stiff as steel, so critical dimensions need support |
| Hard chrome plating | A hard surface layer deposited on the cavity | One way to add wear resistance to an aluminum cavity |
Aluminum tooling questions, answered
Why doesn’t injection mold use aluminum more often?
What are the advantages of aluminum molds over steel?
What are the limitations of aluminum injection molds?
How many shots can an aluminum injection mold produce?
Can aluminum molds use glass-filled plastic?
Is 7075 the best aluminum for injection molds?
How much does an aluminum injection mold cost compared to steel?
How fast can an aluminum tool deliver parts?
Can an aluminum mold be hardened or repaired like steel?
Is an aluminum mold suitable for cosmetic or Class A surfaces?
When should I order steel instead of aluminum?
Can aluminum molds run hot runner systems?
The tooling services this aluminum guidance covers
Send us the drawing and we will tell you whether aluminum is the right call
Share the STEP or IGS file, the resin grade and filler content, and the shot count you need. We will tell you whether an aluminum bridge tool is the right answer, which features need a hardened insert, what shot life to expect with your resin, and what the steel tool will cost when the program needs it.
No obligation. NDA available.
- 23+ Years of experience
- 2,000+ Molds per year
- 24h Quote turnaround