
Injection Molding vs 3D Printing: Which One Should You Choose?
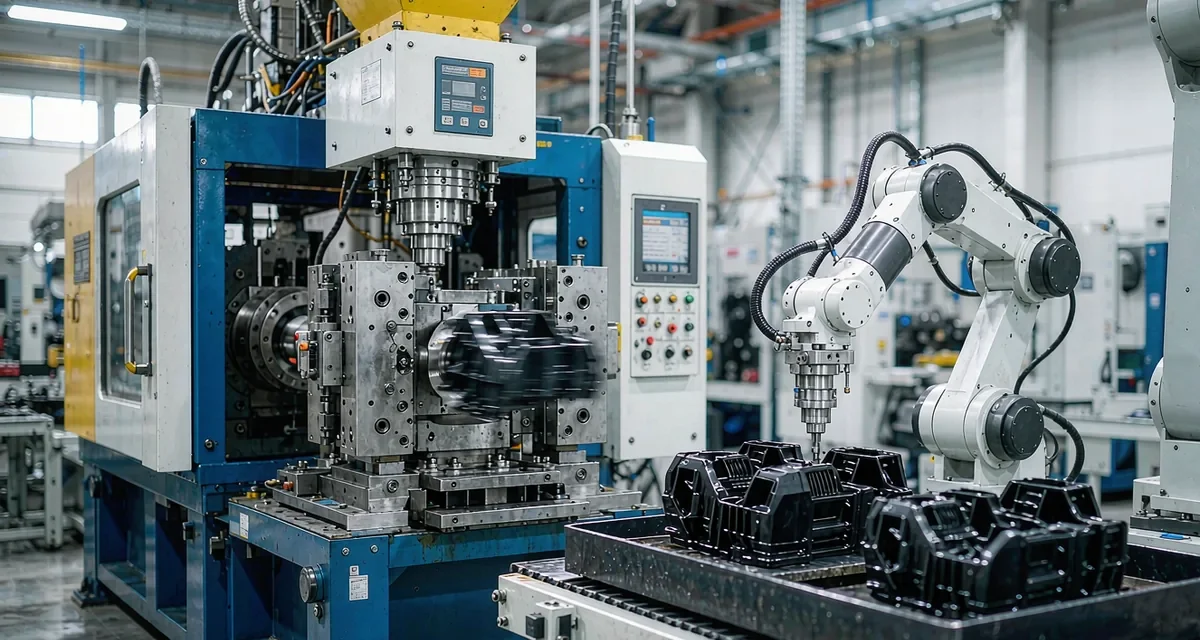
3D printing is the fastest way to hold a plastic part in your hand. Injection molding is the cheapest way to hold ten thousand of them. Most buyers we talk to actually need both, just at different stages of the same project. So the useful question is not “which technology wins” but “when should I switch from one to the other”. Here is how we answer that for customers sending us drawings every week.
The short answer
Volume decides almost everything. If you need a handful of parts for a trade show or a fit-check, print them. Once your yearly or lifetime quantity climbs past a few hundred units, a mold pays for itself surprisingly fast, and every part after that costs less than a coffee.
| Your situation | Better choice | Why |
|---|---|---|
| 1–10 parts, design still changing | 3D printing | No tooling cost, parts in days, edits are free |
| 10–500 parts, design nearly frozen | Rapid tooling (aluminum mold) | Mold in 7–15 days, real production material and finish |
| 500–10,000 parts | Injection molding | Per-part cost drops below printing between part 300–800 for most geometries |
| 10,000+ parts, stable design | Injection molding, steel mold | Lowest unit cost, tightest tolerances, full material certification |
Cost per part: where the lines cross
3D printing has almost no setup cost, so part one is affordable. But the price per piece barely drops as volume grows — a printer runs the same slow job whether it is making part 10 or part 10,000. Injection molding is the opposite. You pay for the tool up front, then the machine cycles in 20–60 seconds and material cost is all that remains.
Take a 50-gram ABS housing as a realistic example (prices shift with geometry, but the shape of the curve does not):
| Quantity | 3D printing (FDM) | Injection molding | Molded unit price |
|---|---|---|---|
| 10 parts | $50–$150 total | Mold from ~$2,000 | Printing wins |
| 100 parts | $500–$1,500 total | $2,000 tool + ~$150 parts | ~$21.50/part amortized |
| 1,000 parts | $5,000–$15,000 total | $2,000 tool + ~$1,200 parts | ~$3.20/part amortized |
| 10,000 parts | $50,000+ | $2,000 tool + ~$6,000 parts | ~$0.80/part amortized |
| 100,000 parts | Not practical | Tool long paid off | ~$0.30–$0.60/part |
The crossover for a simple part usually lands somewhere between 300 and 800 units. Complex parts with many features push it higher because they need a more expensive mold. Simple, small parts cross over even sooner, especially in a multi-cavity tool.
Lead time: printed today, molded next month
| Route | Typical lead time | Best for |
|---|---|---|
| FDM / SLA printing | 1–7 days | Fit checks, early prototypes |
| Aluminum rapid tool | 7–15 days | Design validation in production material |
| Steel production mold | 25–35 days | Mass production launch |
3D printing clearly wins the first round. But buyers often underestimate how long “iteration by printing” really takes: each design change means a new print job, new supports, new finishing. A mold iteration is slower per change but freezes the design — and once the design is frozen, molding storms ahead at hundreds of parts per day. If your schedule has a pilot run before mass production, our rapid tooling service bridges that gap nicely.
Surface finish, strength and tolerances
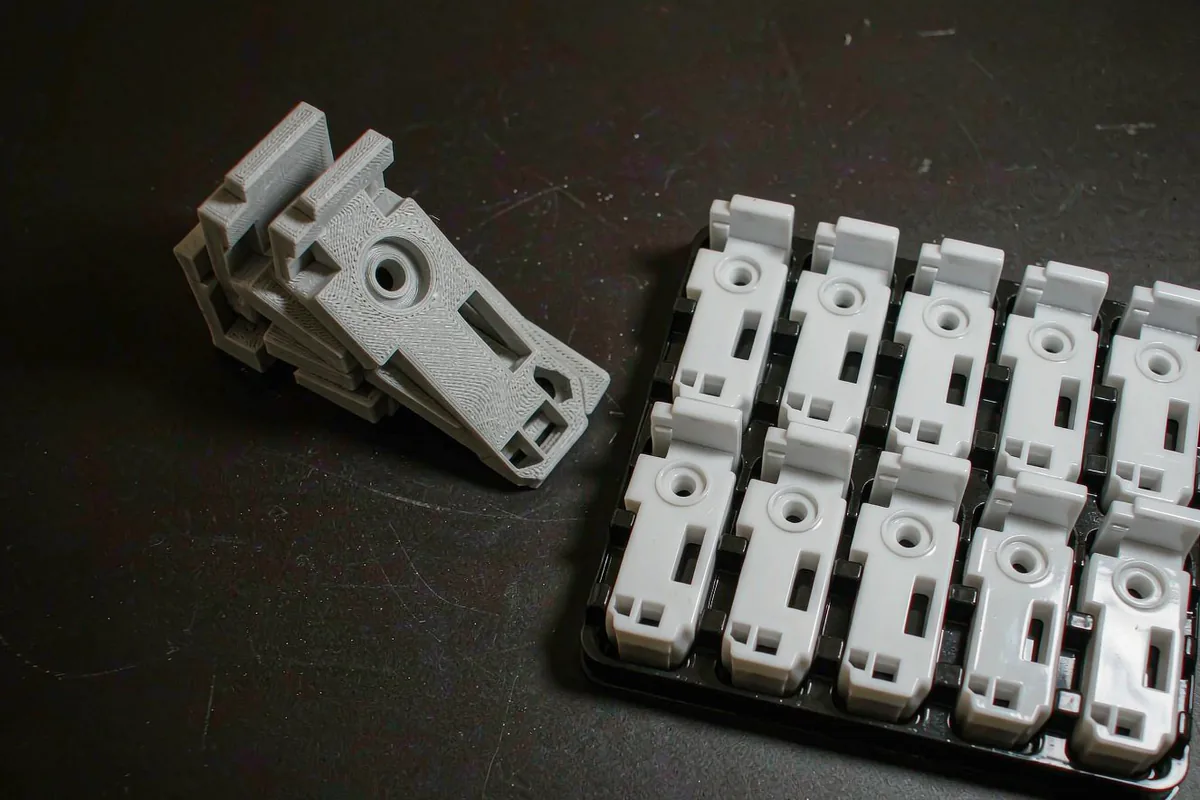
Put a printed part next to a molded one and the difference is obvious. FDM shows layer lines on every surface; SLA is smoother but needs support removal and sanding. A molded part comes out of the tool with a finish you specify — glossy SPI A1, textured, matte — and it looks identical on part one and part fifty thousand.
- Tolerances: molding holds ±0.02–0.05 mm on critical features in production tools; FDM sits around ±0.2–0.5 mm and drifts with filament quality and chamber temperature.
- Strength direction: FDM parts are anisotropic — they split along layer lines under load. Molded parts are isotropic, and the process itself aligns fibers in filled resins.
- Repeatable properties: molded parts from cavity one and cavity eight of the same tool share a documented process window. That traceability is what auditors want to see — our factory runs IATF 16949 for automotive and ISO 13485 for medical work, and a printer shop simply cannot produce the same process evidence.
Materials: a bigger toolbox on the molding side
Printers cover a useful slice of the plastics world — PLA, ABS, ASA, PETG, some nylons and TPEs. Molding opens up the whole engineering catalog: glass-filled PA66, PC, POM, PBT, TPU, LSR, flame-retardant and food-contact grades, plus any color matched to a Pantone number. If your part must survive under-hood heat, UV exposure or sterilization cycles, check our injection molding materials guide — there is a good chance the right resin cannot be printed at all.
Molding has its own constraints, to be fair. Undercuts need side actions. Wall thickness has to stay uniform or you get sink marks. Deep ribs need draft angles. Printing tolerates geometry that a mold would fight. This is exactly why we run a DFM review before quoting every tool — see the injection molding process page for what that review covers.
The path that works for most projects
After a decade of watching projects move through our factory, the sequence that rarely goes wrong looks like this:
- Stage 1: print a few parts. Validate ergonomics and interfaces cheaply while the design is still moving.
- Stage 2: once the CAD freezes, cut an aluminum rapid tool and mold 50–500 parts in the real resin. You now test the actual part, not a stand-in.
- Stage 3: cut the production steel mold — often multi-cavity — with the lessons from stage 2 baked into the design, and launch.
Skipping stage 2 to save a little tool money is the most expensive shortcut we see. Field failures found after the production tool is cut usually mean re-machining steel, and steel is not forgiving.
Frequently asked questions
Is 3D printing cheaper than injection molding?
Below roughly 100 units, yes — there is no tool to pay for. Somewhere between 300 and 800 units for a typical part, the amortized mold cost drops below the printing price per piece, and molding gets cheaper for every unit after that.
Can you 3D print a mold and inject into it?
Printed molds survive a few dozen shots at low pressure and are occasionally used for tiny test runs. They cannot hold production tolerances or pressures, so we do not recommend them for anything customer-facing. An aluminum tool costs a fraction more and lasts 60,000–100,000 shots.
What volume makes injection molding worth it?
As a rule of thumb: 500+ lifetime units with a design that will not change much. Under that, printing or rapid tooling usually keeps total cost lower.
Which process is better for medical or automotive parts?
Injection molding, without much debate. Those industries need certified materials, documented process parameters and repeatable mechanical properties — and the parts usually ship at volumes molding handles naturally.
Can injection molding copy a 3D printed prototype exactly?
Almost. Printed parts sometimes include geometry a mold cannot form — zero-draft walls, sharp internal corners, printed-in overhangs. The DFM review adapts the design for molding, usually with no functional change.
Not sure which side of the crossover your project sits on? Send us the CAD file and target quantity. We will run the DFM review, price both routes honestly, and tell you if printing is the better deal — even though we run the machines. Get a quote within 24 hours.
- 23+ Years of experience
- 2,000+ Molds per year
- 24h Quote turnaround